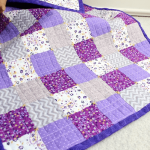
Rail fence quilt pattern never goes out of style!
This is visually appealing and quite easy to make if you have a turn for quilting. However, you need to follow the right steps to pull out such a pattern. This is not any difficult but strategic.
Today, we have brought you a comprehensive guideline on a quilt pattern.
Let’s check it out then.

Craft essentials
- Rotary cutter
- Stripology ruler
- self-healing mat
- Jelly roll – this is a pre-cut bundle including 2 ½ x 42-inch strips fabric.
Let’s begin…
Step 1 – Choose the right size
Once it comes to the size, you can go two ways. You may focus on the desired block size of the quilt. Alternatively, you may pick a strip size and follow that design.
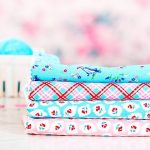
Step 2 – Choose the fabric
Picking the right fabric has a key role to play in the outcome. Especially, in case of a rail fence quilt, you need to be extra cautious about the fabric as it can make all the difference. From color to quality and pattern – check everything while picking a piece of fabric. You may opt for a light, dark, or medium shade according to your preference. But if you are choosing a light color, make sure that it doesn’t look dirty.
Most often, people use worn-out fabric from old clothes. If you are picking a completely light shade, it’s better not to use such fabric as the quilt will look faded and worn out. A dark color can rescue at such a crisis. However, if you buy a bundle of fabric from any online or offline shop, you can always opt for a lighter shade as it will look vibrant.
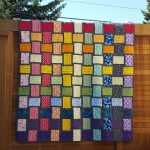
Also, check the pattern of the fabric. You will come across different types of blocks, strips, squares, circular, or random asymmetric patterns and pick your favorite. If you don’t prefer a clumsy design, you can go for a simplistic and minimalistic design. It will give your quilt a sophisticated look.
Here’s a pro tip. No matter whether you cut your old clothes or opt to buy a piece of fabric, you will find it in a folded condition. The creases on the fabric may mar the appearance of the design. It’s better to be cautious at the right stage and press the fabric properly. However, don’t use a dry and hot iron as it will wear out the color. Rather opt for a steam press that will effortlessly remove the creases.
Step 3 – Strip piercing technique
This is the most crucial step – cutting the fabrics. You can use a strip piercing model as most of the quilt patterns display rectangles and squares. So instead of cutting single shapes, you may cut a long strip from the fabric. However, keep an eye on the size.

Step 4 – Sewing
This is the last step. Simply sew the fabric strips together to get your quilt item ready.
Finally, make sure to steam press the item so that it looks vibrant and fluffy! All the best! Let us know your thoughts.