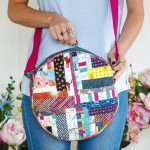
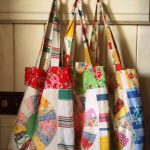
Patchwork bags are stylish and real fun to make. If you follow the right steps, you can easily make a patchwork bag all by yourself! Note how we mentioned, “if you follow the right steps”.
Yes, this is the sole condition to make a beautiful patchwork bag. Failing to follow the guidelines may ruin the entire appearance and usability of your patchwork bag.

The real problem is there are so many guidelines available both in the article and video format. It’s not unusual to get confused about which one to follow especially if you are new to this realm.
No worry. We got you covered! Today, we have brought a comprehensive guideline to create a beautiful patchwork bag real quick! Check it out!
First thing first. Get your hands on the quilter’s grid 820 which is made by Pellon. It is extremely lightweight and fusible facing with a 1-inch grid printed on the other side – the non-fusible one.

Now, once you fuse your patchwork pieces to the interfacing, start to sew them together. This is a pro method that even many professionals use. This actually produces well-designed patchwork bags. The reason is simple. Since you are using a quilted grid, you can rest assured that all the pieces will have a similar pattern, shape, and size – the first three determinants for an amazing patchwork bag. Tote bags always require interfacing and similar size and shaped pieces make things really easy for you to interface them without any hassle!
Quick note: you can buy the Pellon 820 either online from a quilt store or manually from a shop. But make sure of the quality.
Here’s a complete measurement:
You need to cut about 68 squares for making 1 tote bag. The small-sized tote bags require 2-inch squares are about 8 ½” x 4” without the handles. Then the medium tote bags require 4-inch squares and are about 13 ½” x 6” without the handles. Finally, the large tote bags require 5-inch squares and are 18 ½” x 8” without the handles.

Other than these, you require the following things:
- ¼ yd to 1 yd cotton fabric to use as the bag lining
- Lightweight interfacing for these bags – this is especially used for the medium ones
- Fusible fleece for your bags – this is especially used for large ones.
- A pressing paper to protect the iron and the fabric
Now turn on the printed side and mark the boundaries for the bag – 5×4 patches. Make the marks right at the corners of the quilter grids so that these are not much visible once completed. Also, mark a few lines along with these initial marks. Then cut along the lines and sew the pieces!

And voila! Your handmade patchwork bag is all ready to use! These are also great for gift purposes.
We hope our comprehensive guide was helpful for you to make a patchwork bag. Share your thoughts if you have already made such a bag or have a plan to make it sometime soon!